Helping Your Pet Heal After a Medical Procedure: A Day-by-Day Guide
Quick note: This guide is general advice to help you feel confident at home. Always follow your vet’s specific instructions for your pet and procedure.
At a glance: your first priorities
- Keep it calm and cosy: quiet room, soft bed, dim lights, comfy temperature.
- Follow the med plan exactly: pain relief and antibiotics on time; set phone reminders.
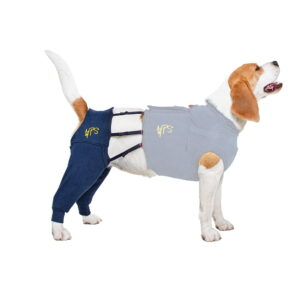
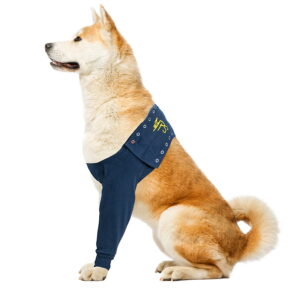
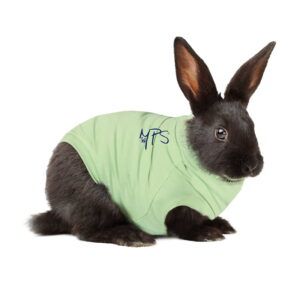
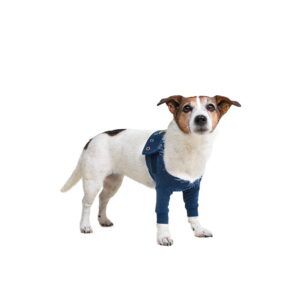
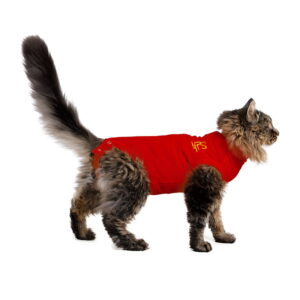
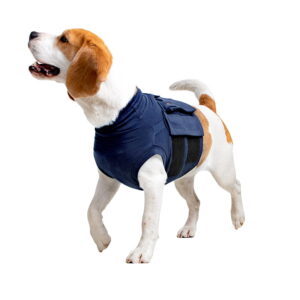
- Protect the incision: stop licking/chewing. A recovery suit is a cone-of-shame alternative many pets tolerate better.
- Offer small meals and fresh water. Expect grogginess in the first 12–24 hours.
- Short, supervised potty breaks only. No running, stairs, or jumping.
- Check the wound twice daily. If you’re worried, call your vet—sooner is better.
Table of contents
- First 24 hours after anesthesia
- Incision care and cleanliness
- Activity limits by procedure
– Spay/neuter timeline (dogs and cats) – Orthopedic/TPLO timeline – Soft-tissue/dental recovery
- Recovery suit vs cone of shame
- When to call your vet
- FAQs
- Recommended recovery essentials
First 24 hours after anesthesia
Feeding and drinking
- Start with a small meal once your pet is fully awake and can swallow normally. Some pets skip the first meal—that’s okay.
- Offer fresh water; don’t force it. If vomiting happens more than twice, call your vet.
- Stick to your vet’s diet plan. Bland food is often recommended for the first day.
Medication and comfort
- Give pain meds and any antibiotics exactly as prescribed. Don’t double-dose if a dose is missed—ask your vet.
- Expect grogginess, wobbliness, or whining for 12–24 hours. Keep lights low and noise minimal.
- Temperature matters: anesthesia can affect body temperature. Keep your pet warm but not hot.
Bathroom breaks and supervision
- Short, on-lead toilet breaks only. Support with a sling/towel for orthopedic cases.
- Cats: use a low-sided litter box. Keep the tray clean and easy to access.
Incision care and cleanliness
Daily checks (morning and evening)
- What’s normal: mild redness/swelling around the edges, clear or slightly blood-tinged seepage for 24–48 hours, soreness to touch.
- Keep it dry and clean. No bathing or swimming until your vet says so.
- Use what your vet recommended for cleaning (often sterile saline and gauze). Avoid harsh disinfectants unless prescribed.
Bandages and stitches
- Follow your vet’s bandage-change schedule. If a bandage slips, gets wet, or smells bad, call your vet for guidance.
- Prevent licking/chewing. A well-fitted recovery suit keeps the area covered and clean.
Signs of trouble (see “When to call your vet” below)
- Increasing redness or swelling after day 2–3, hot skin, thick/yellow/green discharge, bad odor, missing stitches, or a gaping wound.
Helpful reads:
- What Is a Medical Recovery Suit? A Beginner’s Guide
- How to Choose the Right Recovery Suit Size and Style
Activity limits by procedure
Your vet’s protocol comes first. These timelines are typical, not universal.
Spay/Neuter timeline (dogs and cats)
Days 1–3
- Rest only. Short leash walks (dogs) or litter box access (cats).
- Recovery suit on at all times except brief checks. Keep dry and clean.
- Mild swelling or bruising is expected; ice packs are rarely needed unless your vet suggests.
Days 4–10
- Continue strict activity restriction. No running, jumping, tug, rough play, or zoomies.
- Dogs: 5–10 minute leash walks, 2–4 times/day, on flat ground.
- Cats: Enclose in a small room if needed to limit jumping.
- Check the incision twice daily.
After suture removal or after day 10–14 (as advised)
- Gradual return to activity over 1–2 weeks.
- Continue to monitor the incision for any late irritation.
Common questions
- How long should my dog wear a recovery suit after spay/neuter? Often 10–14 days or until your vet confirms healing.
- Can my cat use the litter box while wearing a recovery suit? Yes. Most suits allow normal posture. Keep litter low and clean. If needed, roll back and secure the rear panel per the suit’s instructions.
Orthopedic/TPLO timeline
Week 0–2
- Strict rest. Crate or small room. Carry on stairs.
- On-lead potty breaks only (3–5 minutes).
- Follow your surgeon’s physio plan; only do prescribed range-of-motion or gentle weight-bearing work.
Week 3–6
- Gradually extend on-lead walks (start 5 minutes, add 2–3 minutes every few days if your vet agrees).
- No off-lead, no jumping. Use non-slip mats at home.
Week 7–12
- Controlled strengthening per vet/physio protocol.
- Rechecks determine when to progress to light off-lead.
Tip: A recovery suit can protect surgical sites from licking and reduce anxiety without the bulk of a cone—particularly helpful for crate rest compliance.
Soft-tissue (mass removal, abdominal) and dental recovery
Soft-tissue (skin/tumor/abdominal)
- Expect 10–14 days of restricted activity.
- Suit on to prevent licking; keep the area dry.
- Small meals if abdominal surgery; watch for vomiting, bloating, or pain.
Dental
- May be sleepy the first evening.
- Feed softened food if advised; avoid hard chews for the period your vet recommends.
- Monitor for drooling with blood, foul odor, face pawing, or swelling.
Recovery suit vs cone of shame
Why many vets and owners choose a suit
- Comfort and calm: soft, breathable fabric reduces stress for sensitive pets.
- Better protection: full coverage reduces access to stitches and hotspots.
- Eating, sleeping, and navigating: fewer collisions with furniture; many pets eat and sleep more normally.
- Great for cats: easier litter box use and grooming around the face.
Fit, wearing time, and care
- Sizing: measure chest and back length, then choose per the brand’s chart. Start snug but not tight—two-finger rule at the neck and chest.
- How long to wear: typically 10–14 days or as your vet advises. Keep it on 24/7 except for brief checks/cleaning.
- Sleeping in the suit: Yes—most pets sleep better than in a cone.
- Washing: machine-wash gentle; keep a spare so one can dry while the other is worn.
Shop with confidence
- Shop Suitical Recovery Suits
- Shop At-Home Recovery Essentials
- Shop MPS Protective Wear
- Shop Vet-Recovery Range
Learn more
- What Is a Medical Recovery Suit? A Beginner’s Guide
- How to Choose the Right Recovery Suit Size and Style
- Real story: Meet Georgie: A Tale of Healing, Comfort, and Kitty Love
We ship across South Africa—explore cone-of-shame alternatives that pets actually tolerate.
When to call your vet
Call immediately if you notice:
- Repeated vomiting or diarrhea, severe lethargy, collapse, or difficulty breathing.
- Bleeding through the bandage, or a wound that gapes or loses stitches.
- Increasing redness, swelling, heat, or thick yellow/green discharge after day 2–3.
- Foul odor from the incision, or your pet seems very painful despite meds.
- No urination in 24 hours (dogs) or no litter box use in 24 hours (cats).
- Persistent refusal to eat for more than 24 hours after discharge.
FAQs
How long should my dog wear a recovery suit after spay?
- Usually 10–14 days or until your vet confirms full skin closure. Keep it on 24/7, removing only for quick checks and to wash the suit.
Can my cat use a litter box while wearing a recovery suit?
- Yes. Choose a low-entry tray. Most suits allow normal posture; many have a rear panel you can roll and secure for toileting.
Is it okay if my dog sleeps all day after surgery?
- Extra sleep is common in the first 24 hours. If your dog is hard to rouse, cries in pain, or won’t eat/drink by the next day, call your vet.
When can my pet bathe after surgery?
- Only when your vet approves—often after sutures are removed. Keep the incision completely dry until then.
How do I stop my pet from licking stitches without a cone?
- A properly fitted recovery suit protects the area while allowing normal movement and rest. Add bitter spray only if your vet says it’s safe.
What are signs of infection at the incision site?
- Worsening redness or swelling after day 2–3, hot skin, thick yellow/green discharge, bad odor, or your pet showing increasing pain.
Can a dog sleep in a recovery suit?
- Yes. Most dogs settle more easily in a suit than with an e-collar. Check fit daily and keep a spare suit washed and ready.
Recommended recovery essentials
Build a calm, clean recovery nook with:
- A breathable recovery suit (keep a spare for washing)
- Soft, supportive bed or crate mat
- Non-slip mats for flooring
- Lick mat or slow feeder for enrichment without overexertion
- Sterile saline and gauze (if your vet advises for cleaning)
- Bitter deterrent spray (use only if vet-approved)
Shop recovery must-haves:
- Shop Suitical Recovery Suits
- At-Home Recovery Essentials
- Need tailored support? Read: Specialised Care for Your Furry Family Member
Medical disclaimer
- This article provides general information and does not replace your veterinarian’s diagnosis or treatment plan. If something doesn’t look or feel right, call your vet promptly.

