Dog Wound Care After Surgery: What to Do at Home
Your dog has done the brave part at the vet. Now the healing happens at home, day by day, with your calm eyes and gentle hands. This guide walks you through exactly what to do, what not to do, and when to call your vet. It is dog-specific and focused on surgical wound care.
Note: If you are looking for general dog wound care for non-surgical cuts, scrapes, or hotspots, check our upcoming comprehensive dog wound care hub.
—
Quick-start checklist: first 48 hours
- Keep your dog warm, calm, and confined to a quiet area.
- Offer small, bland meals if appetite is off; ensure fresh water.
- Follow the medication plan precisely; set reminders.
- Check the incision twice daily for redness, swelling, discharge, or gaping.
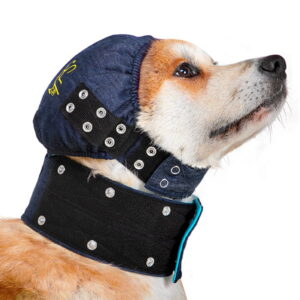
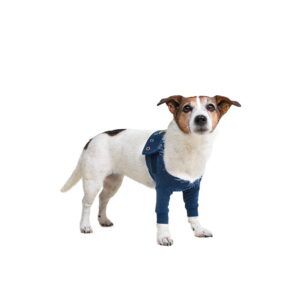
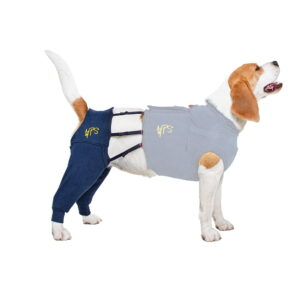
- Prevent licking or nibbling at all times with a well-fitted cone or recovery suit.
- Keep the incision dry; no bathing or swimming.
- Short, leashed toilet breaks only; avoid stairs and jumping.
- Use a harness, not a collar, for control without neck strain.
- If bleeding soaks through or does not slow with gentle pressure, contact your vet immediately.
Pro tip: Many pet parents keep two recovery suits to rotate while one is washed and dried.
—
Dog incision healing timeline: Days 0–14
Every dog heals at their own pace, but the pattern is fairly predictable.
- Days 0–2
– What is usually normal: Mild redness, swelling around stitches, slight warmth, small amount of clear or slightly pink fluid on the bandage or suit. Sleepy or wobbly from anesthesia. – Not normal: Constant bleeding, thick yellow or green discharge, foul smell, extreme swelling, or pain that seems to worsen.
- Days 3–5
– Normal: Redness should begin to fade; edges look closed and dry. Itchiness may start as nerves wake up. – Not normal: Spreading redness, increasing pain, your dog becomes lethargic, refuses food, or develops a fever.
- Days 6–10
– Normal: Skin looks calmer, scabbing minimal, hair starting to regrow. – Not normal: Any new discharge, suture line opening, or your dog fixating on the incision despite protection.
- Days 10–14
– Many dogs have sutures removed now. Dissolvable stitches will soften and fall away over several weeks. – Your vet will guide the next steps. Continue protection until your vet says the incision is fully sealed.
Typical stitch removal is 10–14 days, but orthopedic or tension-heavy incisions often need longer protection.
—
How to clean your dog’s surgical incision
Only clean if your vet has advised it or if there is mild dried residue. Over-cleaning can irritate healing skin.
Safe solutions:
- Sterile saline or cooled, boiled water.
- Chlorhexidine 0.05 percent (dilute 2 percent chlorhexidine at 1 to 40: 25 ml in 1 liter of saline or water).
- Dilute povidone-iodine to the color of weak tea.
Avoid: Hydrogen peroxide, alcohol, witch hazel, essential oils, human antiseptic creams, or powders unless your vet specifically instructs otherwise.
Step-by-step: 1) Wash your hands and prepare clean gauze or cotton pads. 2) If using a recovery suit, gently roll fabric away from the incision. 3) Moisten a pad with your vet-approved solution. 4) Dab around the incision. Do not scrub. Work from the cleanest area outward. 5) Pat dry with fresh gauze. Leave the area open to air for a few minutes before re-covering with the suit. 6) Reward your dog and recheck the suit or cone fit. 7) Repeat only as directed by your vet, typically once daily or less.
If you see thick discharge, a bad smell, or the wound edges separating, stop cleaning and contact your vet.
—
Prevent licking: cone vs recovery suit
Licking is the number one cause of infections and suture failure. Choose the barrier your dog tolerates best, and keep it on 24/7 unless you are directly supervising.
- Cone (E-collar)
– Pros: Hard to outsmart, protects most areas. – Cons: Can bump into furniture, some dogs panic or struggle to sleep.
- Recovery suit
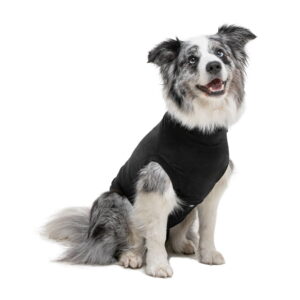
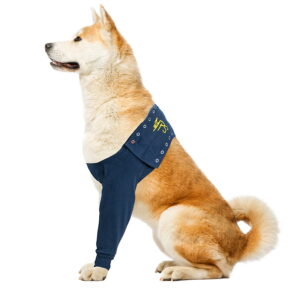
– Pros: Full-coverage comfort, less stress, prevents fur contamination, allows normal eating and drinking, easy toileting with openings. – Cons: Must fit correctly and stay fully fastened to be effective.
Fit tips for suits:
- Snug but not tight; you should slide two fingers under the fabric.
- Check that all snaps or zips are secured and that the rear opening is aligned for toileting.
- Inspect for rubbing at armpits and groin.
- Shop Recovery Suits for Dogs on TailMe (add link to your dog medical recovery category).
- Read our cone vs recovery shirt guide in TailTalk for a detailed comparison.
- How long should a recovery suit be worn? See our dedicated article for timelines and tips.
—
Activity, bathing, and walks
- Activity: Strict rest for at least 10–14 days, or as your vet prescribes. No running, jumping, tug, fetch, or roughhousing.
- Walks: Short, calm, leashed toilet breaks only for the first 3–5 days. Gradually increase duration if your vet agrees.
- Bathing: Keep the incision completely dry. Most dogs can bathe only after stitches are out and the skin is sealed, usually after day 10–14, and with vet approval.
- Swimming: Not until your vet explicitly says yes.
—
What is normal vs infection signs
Often normal:
- Mild pinkness that decreases after day 2 or 3.
- Slight firmness under the incision as tissues knit.
- Light, watery or slightly blood-tinged seepage in the first 24–48 hours.
Red flags: call your vet
- Fever over 39.4 C or your dog feels very hot and dull.
- Spreading redness or streaks, rapidly increasing swelling, or the skin feels tight and painful.
- Thick yellow, green, or foul-smelling discharge.
- A gap in the incision or visible tissue beneath the edges.
- Your dog will not stop trying to lick or chew the area, even with protection.
- Your dog seems unusually lethargic, refuses food, or vomits repeatedly.
- Bleeding that does not slow within 5–10 minutes of gentle pressure with clean gauze.
Clear versus pus:
- Clear or pink-tinged fluid early on can be normal.
- Creamy, yellow, green, or bloody clots with odor are not. Seek veterinary advice.
—
Surgery-specific notes
- Spay or neuter
– Expect mild swelling and bruising near the incision. Male dogs may have scrotal swelling for a few days. – Licking risk is very high due to itchiness; keep protection on continuously. – Many dogs wear a recovery suit for 10–14 days.
- Mass removal
– Edges can look irregular depending on the lesion size. You may see a small seroma, a soft fluid pocket, under the skin; call your vet if it enlarges, becomes painful, or feels hot.
- Orthopedic or tension-heavy incisions
– These need longer rest and protection. Follow your surgeon’s plan strictly, including physiotherapy timing.
—
Nutrition and comfort for healing
- Protein: Aim for high-quality protein in meals to support tissue repair.
- Omega-3s: Fish oil can help moderate inflammation; ask your vet for dosing.
- Hydration: Fresh water always available; slightly warm food can entice picky eaters.
- Gut care: If on antibiotics, ask your vet about a dog-safe probiotic.
- Comfort: A quiet den space, non-slip flooring, and enrichment that does not require running, such as snuffle mats or food puzzles.
Avoid starting new supplements without your vet’s go-ahead.
—
When to call the vet
- You are worried. Trust your instincts.
- Fever over 39.4 C, shivering, or collapse.
- Wound edges open, stitches missing, or persistent bleeding.
- Sudden swelling, especially if the skin feels tight or your dog cries when you touch near the area.
- Discharge that is thick, colored, or smelly.
- Your dog chews or licks despite a cone or suit.
- Your dog’s pain seems uncontrolled between prescribed doses.
—
FAQs
- How long should my dog wear a recovery suit or cone after surgery
– Most dogs need protection for 10–14 days or until your vet confirms full skin closure. Orthopedic cases may need longer.
- Can I take the cone or suit off at night
– No, unless you are awake and directly supervising. Licking often happens at night.
- Is redness around stitches normal
– Mild pinkness for 2–3 days is common. Spreading or worsening redness is not and needs a vet check.
- When can my dog go for a proper walk
– Short, controlled toilet breaks for the first few days. Ask your vet before increasing distance or pace.
- When can my dog have a bath
– Usually after stitches are removed and the incision is sealed, commonly after day 10–14, with vet approval.
- What can I safely put on my dog’s wound
– Usually nothing other than your vet-approved cleanser. Avoid human ointments, peroxide, or alcohol unless your vet prescribes something specific.
- My dog keeps trying to lick the incision. What do I do
– Ensure a correct cone size or switch to a properly fitted recovery suit. Add a second barrier if needed and discuss anxiety-calming strategies with your vet.
- How long do dog stitches take to heal
– Skin usually seals in 10–14 days. Dissolvable sutures may remain under the skin for several weeks.
—
Supplies checklist
- Recovery suit in the correct size; consider two for rotation.
- Cone or soft e-collar alternative as backup.
- Sterile saline or vet-approved dilute chlorhexidine or povidone-iodine.
- Gauze pads and cotton rounds.
- Dog-friendly thermometer and lubricant.
- High-value treats for calm handling.
- Harness and short lead.
Looking for gentle protection that dogs actually tolerate
- Shop Recovery Suits for Dogs in our store.
- Explore e-collar alternatives for sensitive dogs.
- See real recoveries from our community in TailTalk case studies.
—
Why skin heals the way it does
The skin is your dog’s largest organ and the first barrier against the world. Understanding the layers helps explain why careful aftercare matters.
- Epidermis: The outer shield, constantly renewing.
- Dermis: The living support layer with blood vessels, nerves, and glands that feed and protect the skin.
- Hypodermis: The cushioning fat layer that absorbs shock and insulates.
Healing stages you will notice:
- Hemostasis and inflammation: The body stops bleeding and clears debris. Some warmth and swelling are expected early on.
- Debridement: Dead cells are removed; a little clear fluid can occur.
- Repair and remodeling: New tissue fills in and strengthens over weeks.
Your calm routine and good hygiene guide these stages in the right direction.
—
Medical disclaimer
This guide is educational and does not replace individualized veterinary advice. Always follow your own vet’s instructions for your dog’s specific surgery and health history.

